Budget Structure
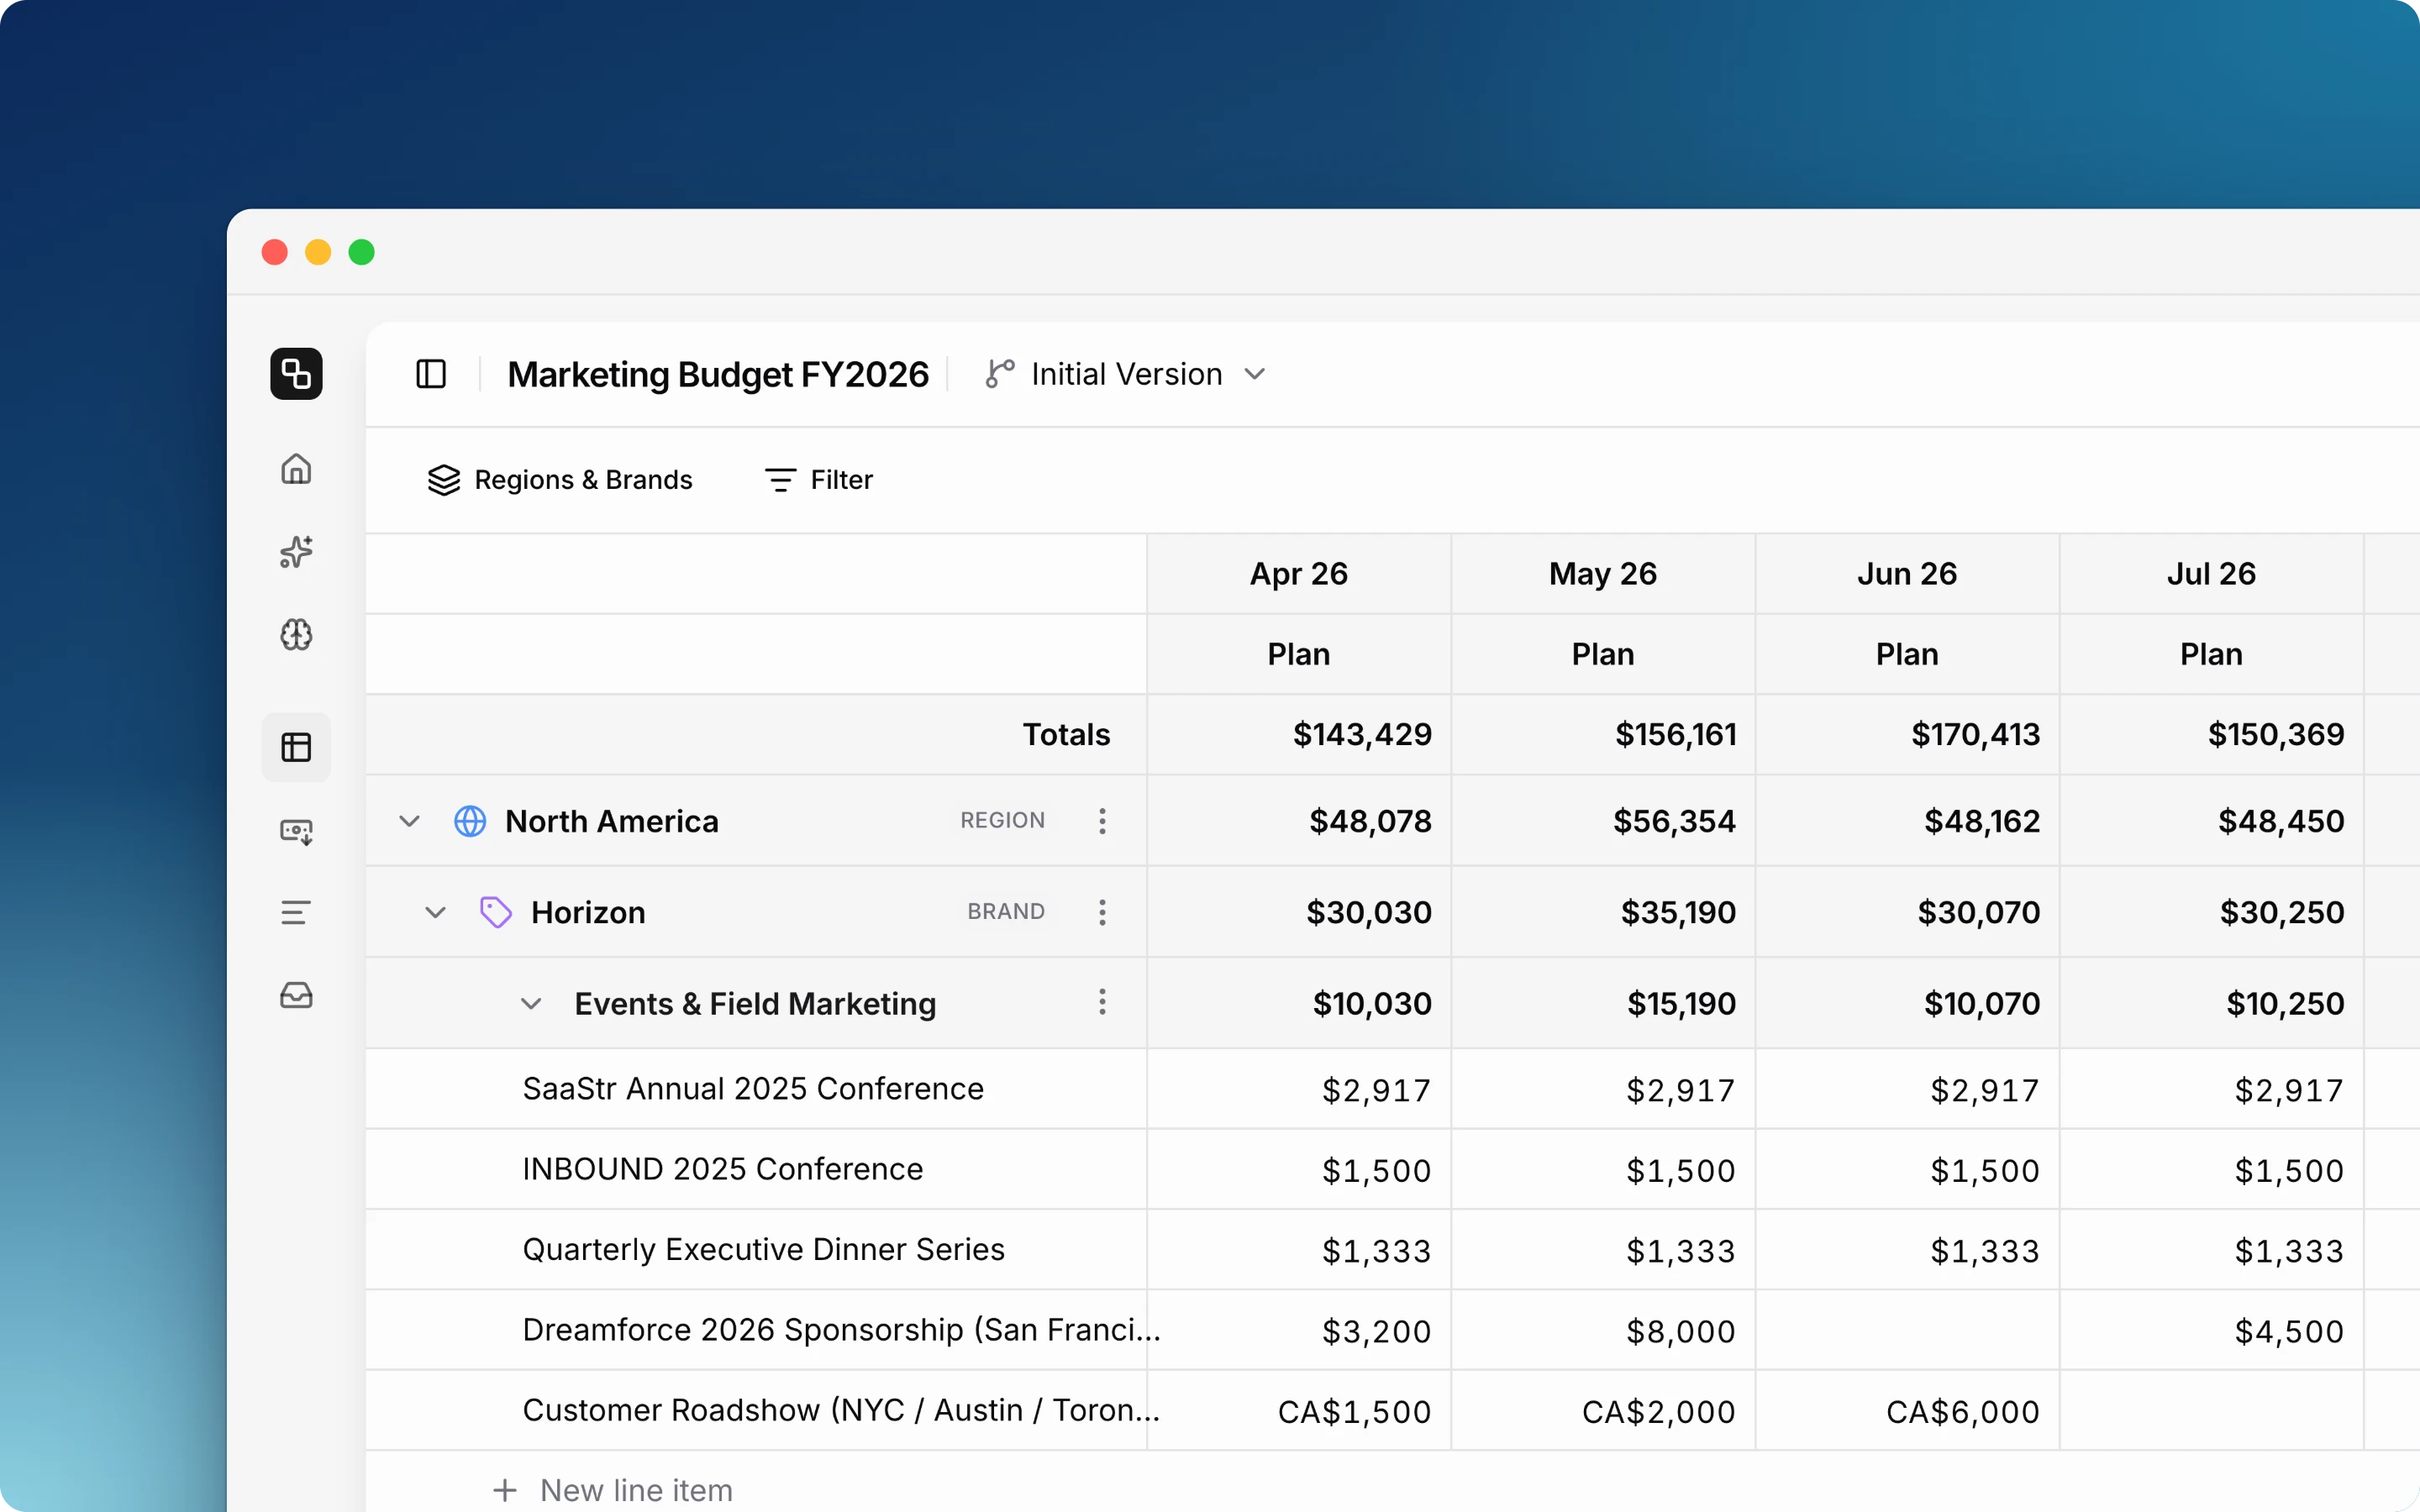
A budget in Etropo has up to six levels. Each level groups the level below it. Only categories and line items are required, so you use only the levels your company needs.
The six levels
| Level | Required | Example | What it does |
|---|---|---|---|
| 1. Custom level | No | Brands, divisions, regions, markets | Splits the budget into sections with their own totals and access |
| 2. Custom level | No | Brands, divisions, regions, markets | Splits each item of level 1 again, for example each region by brand |
| 3. Master category | No | Paid Media | Groups related categories |
| 4. Category | Yes | Paid Search | Holds the line items |
| 5. Line item | Yes | Google Ads - Brand Keywords | The row you plan money on, with a planned amount for each month |
| 6. Expense | No | Mar 3 invoice, $2,400 | One payment under a line item. The expenses of a month add up to its actuals |
Levels 1 and 2 are custom levels. You choose and name them when you create the budget. Use them for groupings such as brands, divisions, regions or markets. You can use one custom level, two, or none. Learn more about expenses.
Example of a budget that uses all six levels:
Marketing Budget 2027
└── North America                         1. Custom level (Region)
    └── Horizon                           2. Custom level (Brand)
        └── Digital Marketing             3. Master category
            └── Paid Search               4. Category
                └── Google Ads - Brand    5. Line item
                    └── Mar 3 invoice     6. Expense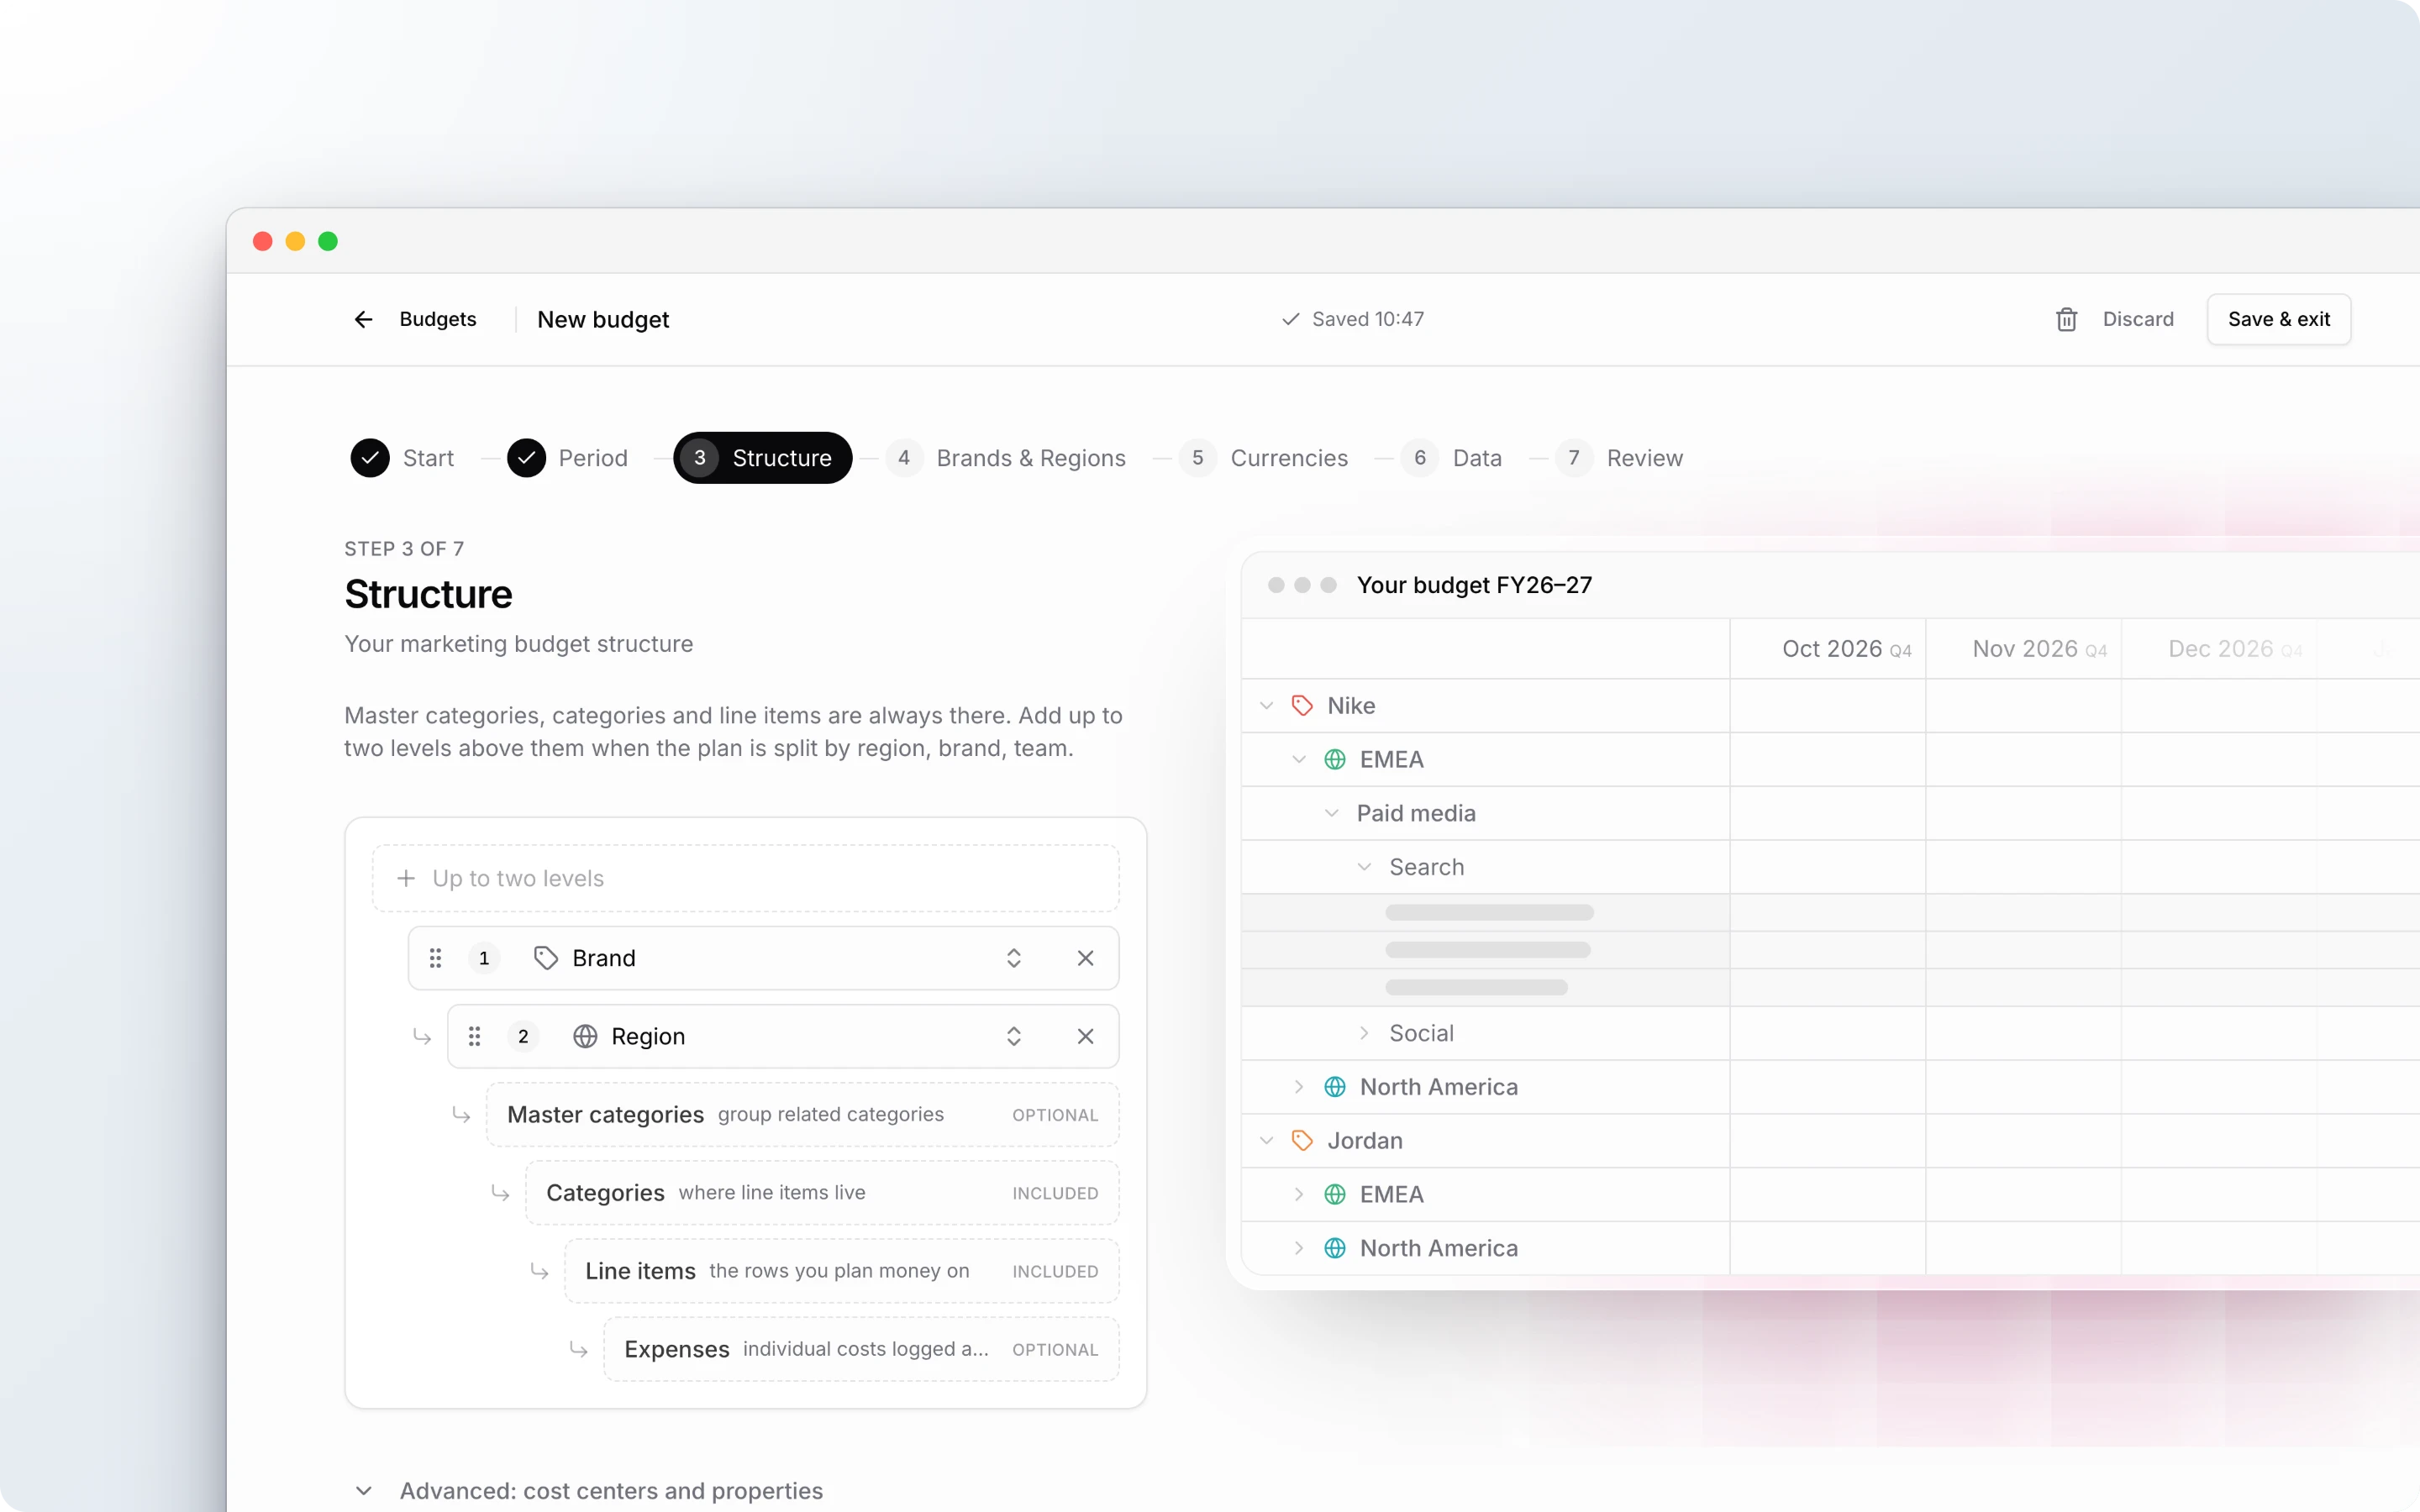
Which levels do you need
| Your budget | Levels to use |
|---|---|
| One team, up to about ten categories | Categories and line items only |
| Many categories that fall into a few groups, for example by channel | Add master categories |
| Several regions, brands, divisions or markets in one budget | Add custom levels, with or without master categories |
You can add or remove master categories at any time. You choose custom levels when you create the budget, and you cannot add or remove them later.
Custom levels
You name each custom level, for example Brand, Division, Region, Market, Business unit, Country, Team or Department, or any name you type. The examples below use a budget split by Region (level 1) and then by Brand (level 2). With other names, the app shows your names and the steps stay the same.
Each custom level has items, for example EMEA, North America and APAC for Region. Every region contains every brand, so 3 regions and 2 brands give 6 sections.
In the Budget Editor, each region and each brand is a header row above its categories:
- The header shows the level name as a badge, for example Region, with an icon and a colour. It also shows the total of every category under it for each month and for the year.
- Click the arrow on a header to collapse or expand everything under it.
- Click the toolbar button named after your custom levels, for example Regions & Brands, to show or hide regions and brands. Hiding is only for you and does not change the budget.
- Categories that belong to no region or brand sit under Other at the end of the grid.
Add a category to a region or brand
Only administrators can add categories. Categories go into the lowest custom level, for example a brand.
- Click the ⋯ menu on the header of the brand.
- Click Add category here or Add master category here.
- Enter the name and click Create Category.
When you add a category from Add Category at the bottom of the grid instead, select the brand in the Brand field.
Edit a region or brand
- Click the ⋯ menu on the header, then Edit Region or Edit Brand.
- Change the name, icon or colour, and save.
Categories and access are not affected.
Delete a region or brand
- Click the ⋯ menu on the header, then Delete Region or Delete Brand.
- Choose Keep them under Other or Move them to another item for its categories.
- Type the name of the region or brand and click Delete.
The categories keep every line item and value.
You cannot add a new region or brand in the Budget Editor yet. Add all of them in the budget creator.
Master categories
Master categories are available in every budget. A budget without them shows a flat list of categories. The moment you create one, the grid switches to the grouped view, and categories that belong to no master category sit under Other. Delete the last master category and the budget is flat again. Line items and values are not affected either way.
A master category holds categories only. It cannot hold another master category.
Create a master category
Only administrators can create or reorganize categories.
- Click the arrow next to New Line Item at the bottom of the grid, then Add Master Category. In a budget with custom levels, add it to a brand instead.
- Enter the name and save.
Put categories under a master category
- Create it there. Click the ⋯ menu on the master category row, then Add Category.
- Move an existing one. Click the ⋯ menu on a category, then Move Category, and select the master category. Line items, amounts and comments move with it.
- While creating a category. The New Category dialog has a Master Category field when the budget has at least one master category. Select one, or None (standalone category).
The master category row shows the total of its categories. Click the arrow to collapse or expand them.
Access
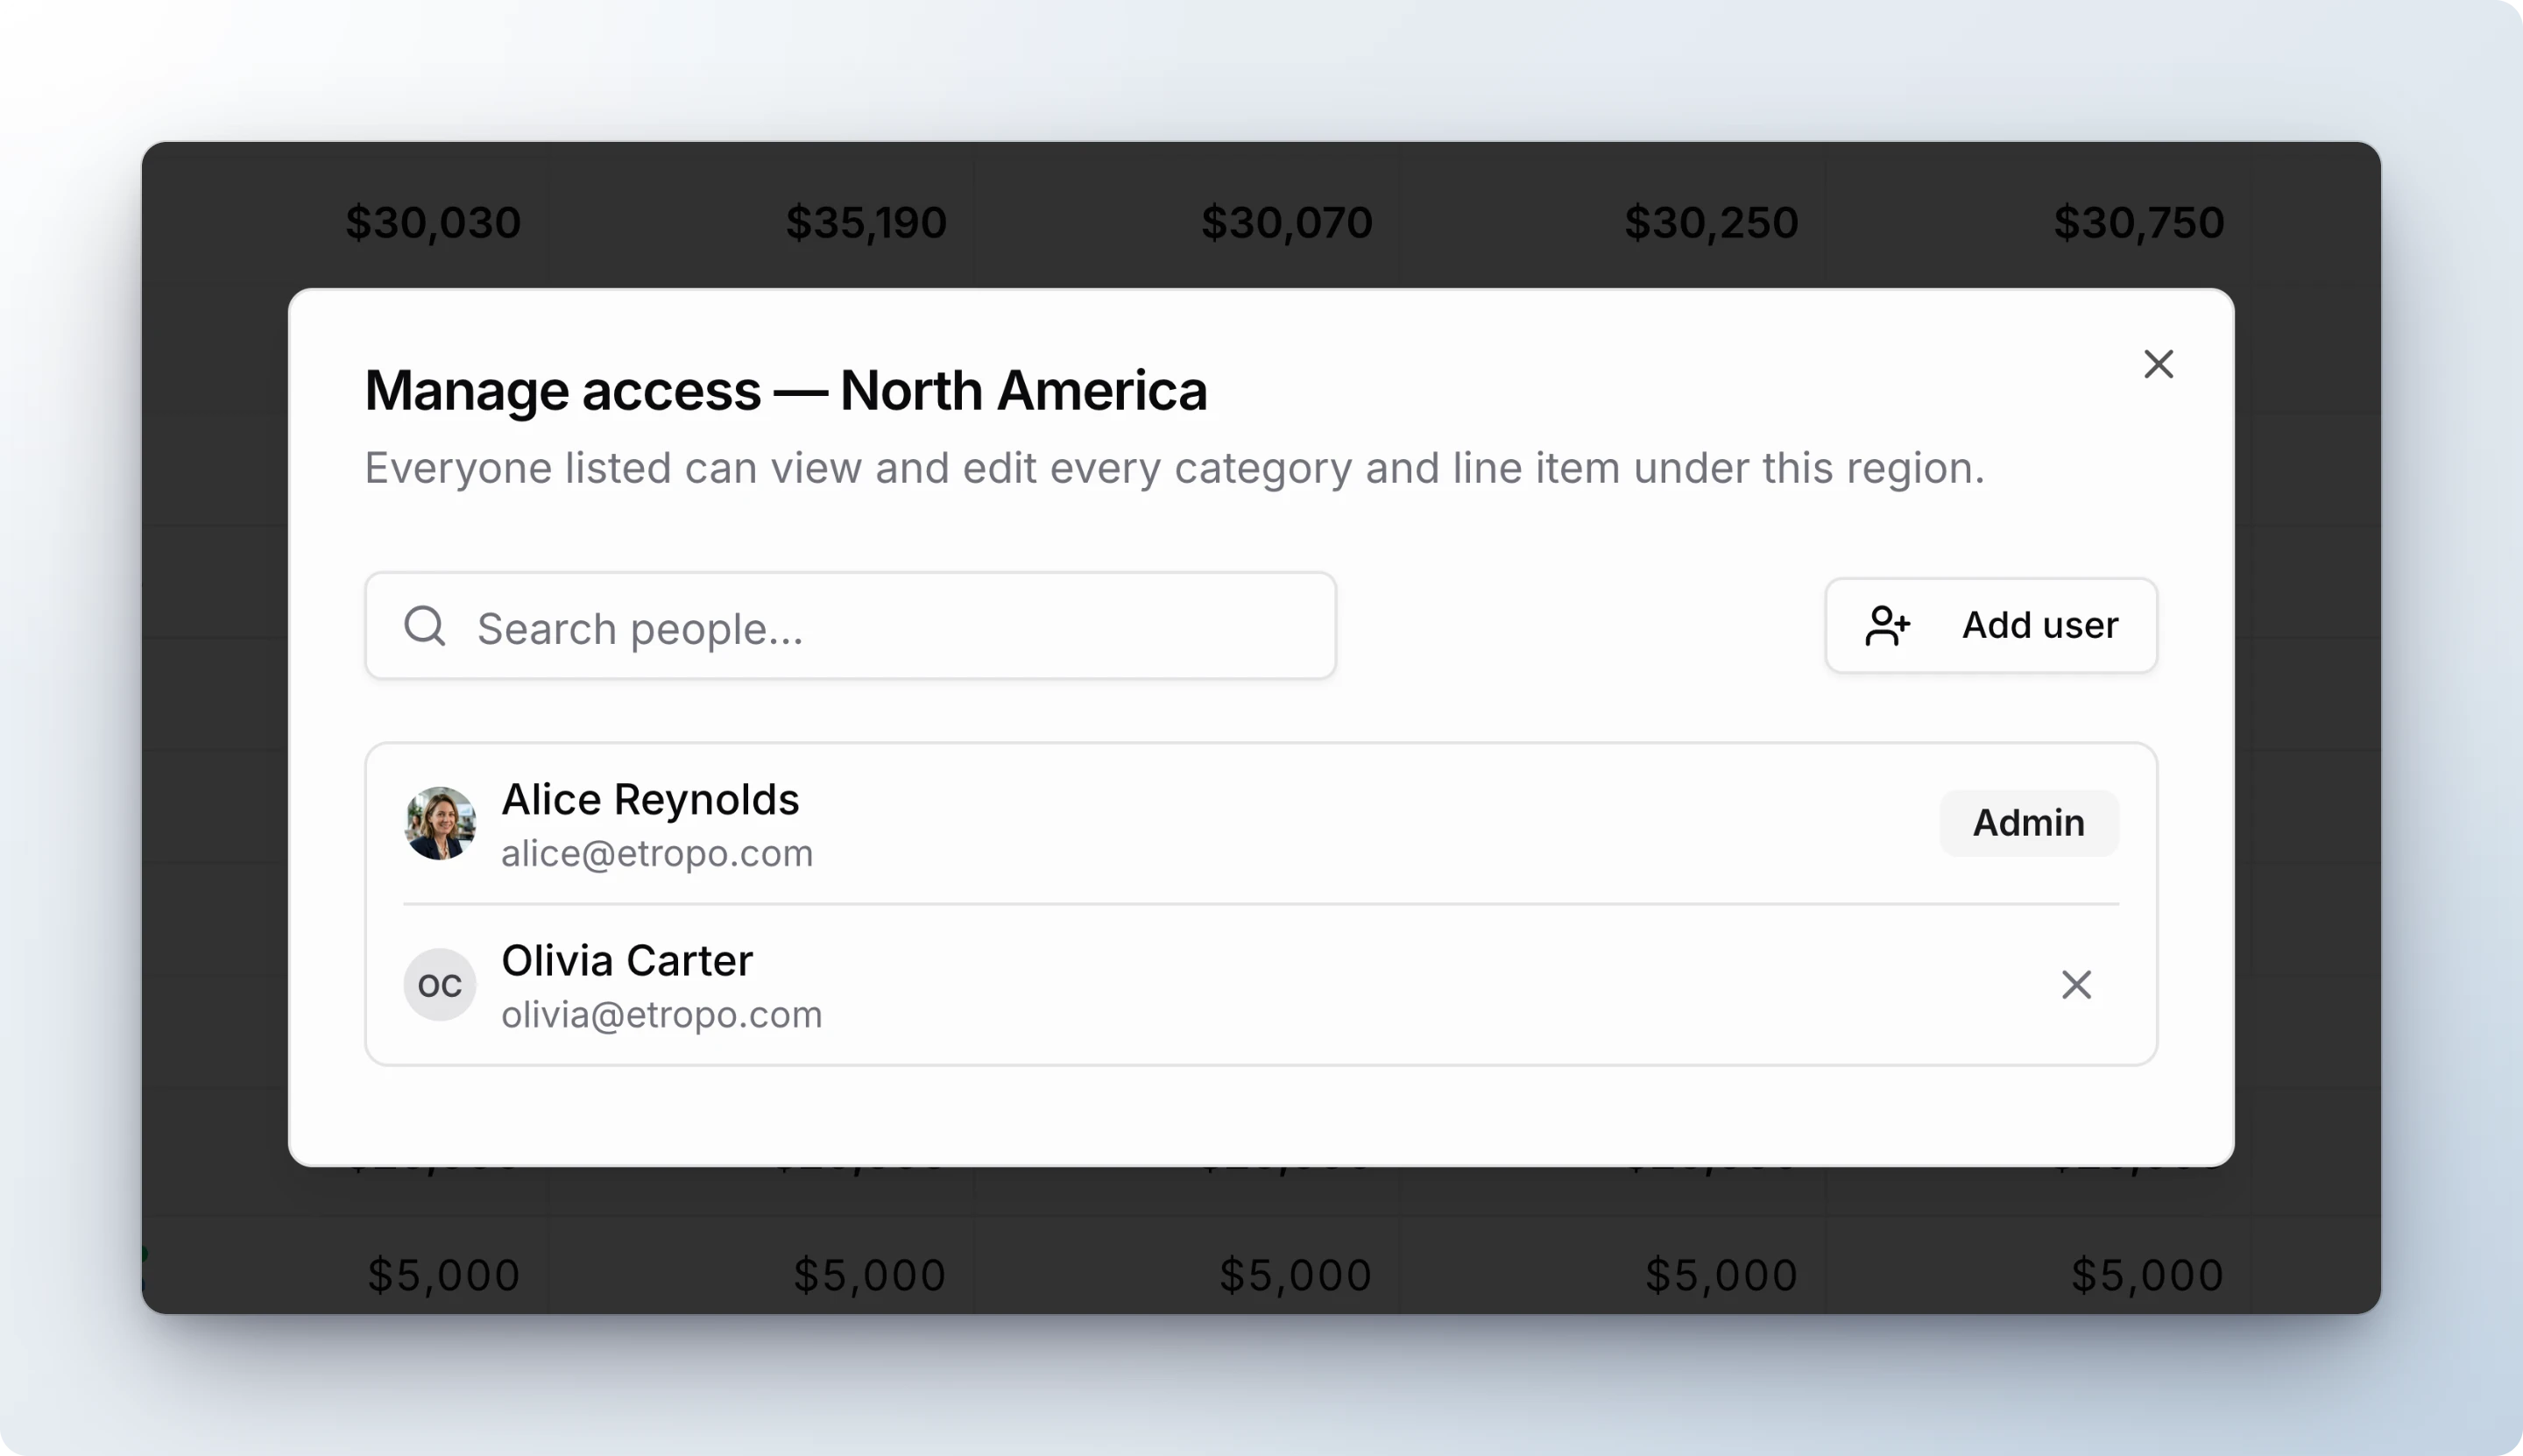
Access follows the levels. Access on a region, a brand or a master category includes everything under it. To grant it, use Manage access in the ⋯ menu of the header. Learn more in Access Control.
Levels in exports, dashboards and Budget Buddy
- The Excel export and the Google Sheets integration add one column per custom level, for example Region and Brand, and a Master Category column when the budget uses them. Learn more in Exporting Budgets.
- Dashboard charts and variance analysis roll line items up to their category and master category.
- Budget Buddy knows all six levels. Ask for “EMEA paid media” or “the total for the Horizon brand”, or ask it to create a budget by region and brand. Learn more in What You Can Do with Etropo AI.
For additional help you can reach out to our support team at: help@etropo.com