Invoice Automation
Invoice Automation extracts details from your PDF invoices and matches them to budget line items automatically. You can either upload invoices directly or forward them via email.
How it works:
- Upload or email PDF invoices
- AI extracts the amount, date, and description
- Review the extracted details and matched line item
- Confirm to apply the actual to your budget
Upload Invoices
Upload PDF invoices directly from the Etropo interface. This is the fastest way to process invoices when you have files on your computer.
How to Upload
From Invoice Automation:
- Go to Invoice Automation in your sidebar
- Click Upload Invoices
- Select one or more PDF files
- Wait for AI to extract the details
- Review and confirm each invoice
From a Line Item:
- Open the line item details
- Click Upload Invoice
- Select your PDF file
- The invoice will be pre-linked to that line item
Email Invoices
Forward PDF invoices to your organization’s unique email address. This is useful when vendors send invoices directly to your inbox.
Set Up Your Invoice Email
- Go to Settings in your sidebar
- Click Invoice Email
- Click Generate Invoice Email
- Copy your unique email address
Only organization administrators can generate or delete the invoice email address.
Send Invoices
Once you have your email address:
- Forward any invoice PDF to your organization’s invoice email
- You can attach multiple PDFs to a single email
- You’ll receive a confirmation when the invoice is received
Review Pending Invoices
- Go to Invoice Automation in your sidebar
- Click the Invoices tab
- You’ll see all pending invoices awaiting review
Each invoice shows:
- Sender Email - Who sent the invoice (for emailed invoices)
- Invoice Date - When the invoice was issued
- Description - The invoice title or description
- Amount - The total invoice amount
- Line Item - The matched budget line item
- Month - When the expense will be recorded
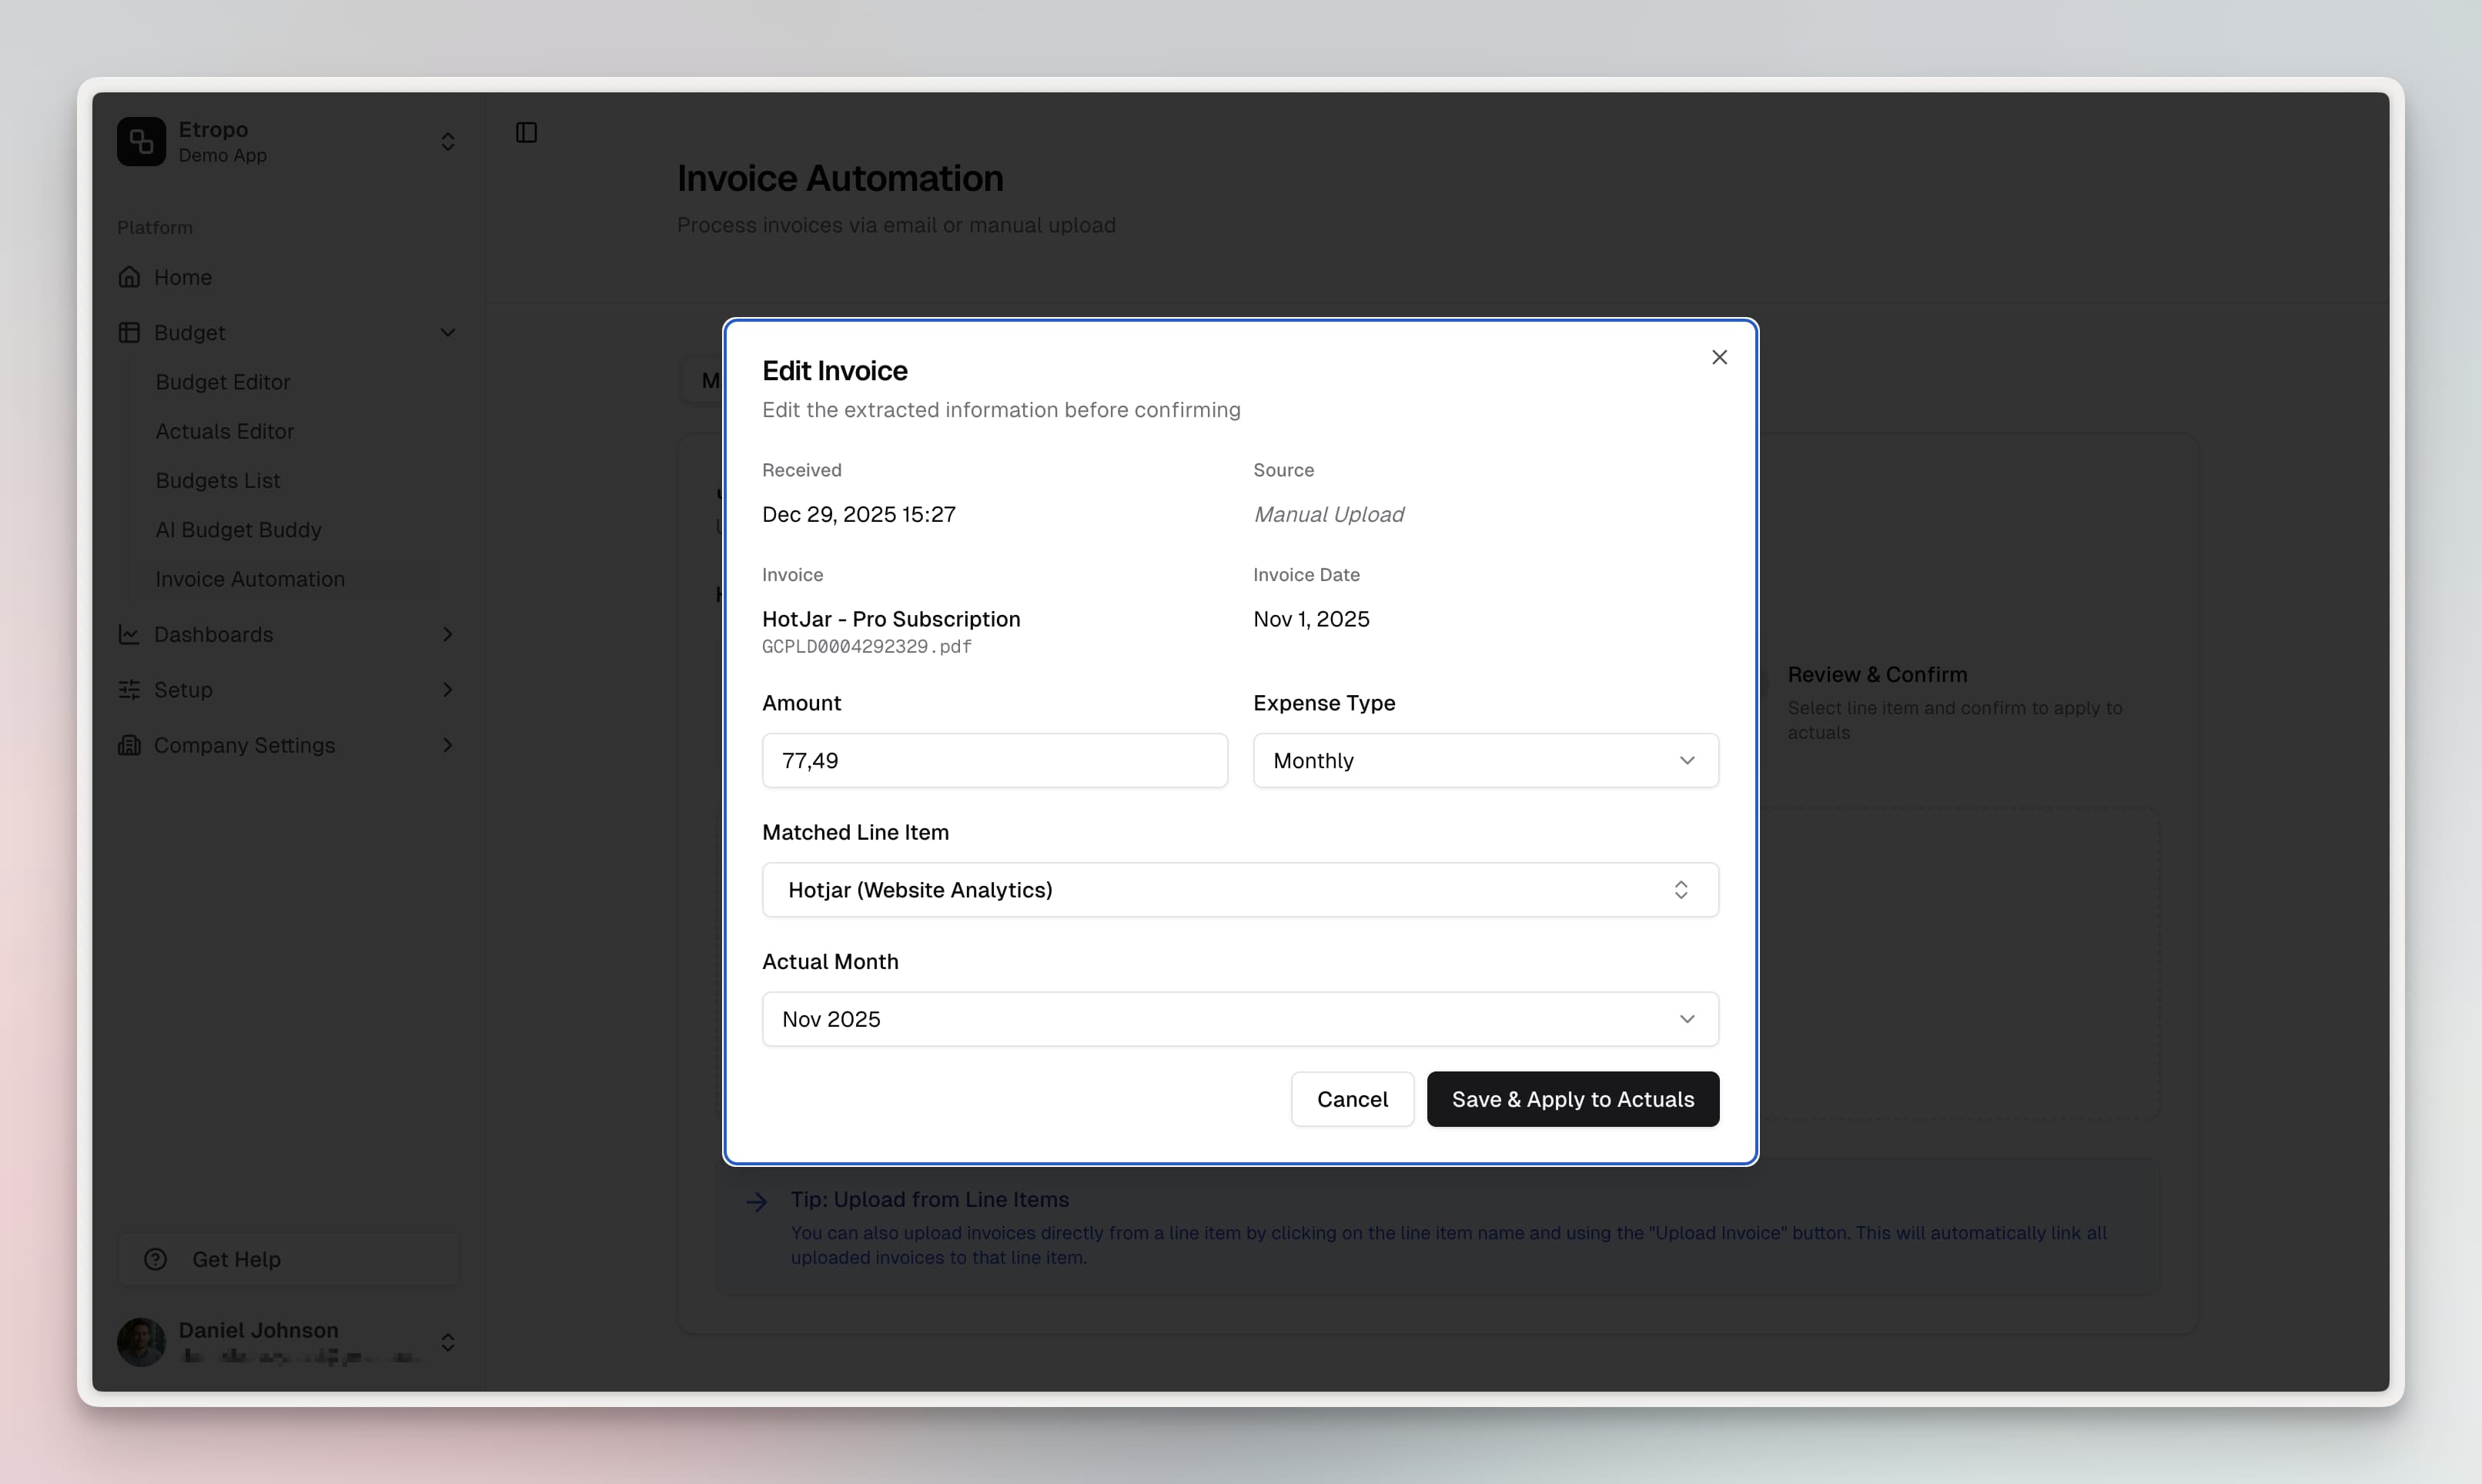
Edit Invoice Details
Click any invoice to open the details panel:
- Review the automatically extracted information
- Correct the amount if needed
- Change the matched budget or line item
- Choose the expense allocation:
- Monthly - Record the full amount in a specific month
- Yearly - Spread the expense evenly across 12 months
Confirm or Reject
- Confirm - Applies the invoice amount to your budget actuals. The sender receives a confirmation email.
- Reject - Archives the invoice without applying it. The sender is notified.
Email Notifications
Invoice senders receive automated notifications throughout the process:
- Receipt Confirmation - When the invoice is received
- Processing Failed - If the PDF couldn’t be processed
- Needs Manual Review - When automatic matching isn’t possible
- Invoice Confirmed - When you approve the invoice
- Invoice Rejected - When you decline the invoice
Access and Permissions
Organization Administrators:
- Generate and delete the invoice email address
- Review, edit, confirm, and reject invoices for line items they can access
Organization Members:
- Review, edit, confirm, and reject invoices for line items they can access
- Cannot generate or delete the invoice email address
You’ll only see invoices for line items you have access to.
Supported Formats
Invoice Automation supports PDF files only. Image files (JPG, PNG), Word documents, and spreadsheets are not supported.
Best Practices
For accurate extraction:
- Use clear, well-formatted invoice PDFs
- Ensure invoices include the date, amount, and description
- Review extracted details before confirming
For security:
- Only share your invoice email with trusted vendors and team members
- Regenerate the email address if it’s compromised
For efficiency:
- Set aside time weekly to review pending invoices
- Keep your budget line items up to date for better matching
- Test with a sample invoice before sharing the email address widely