Create a Budget
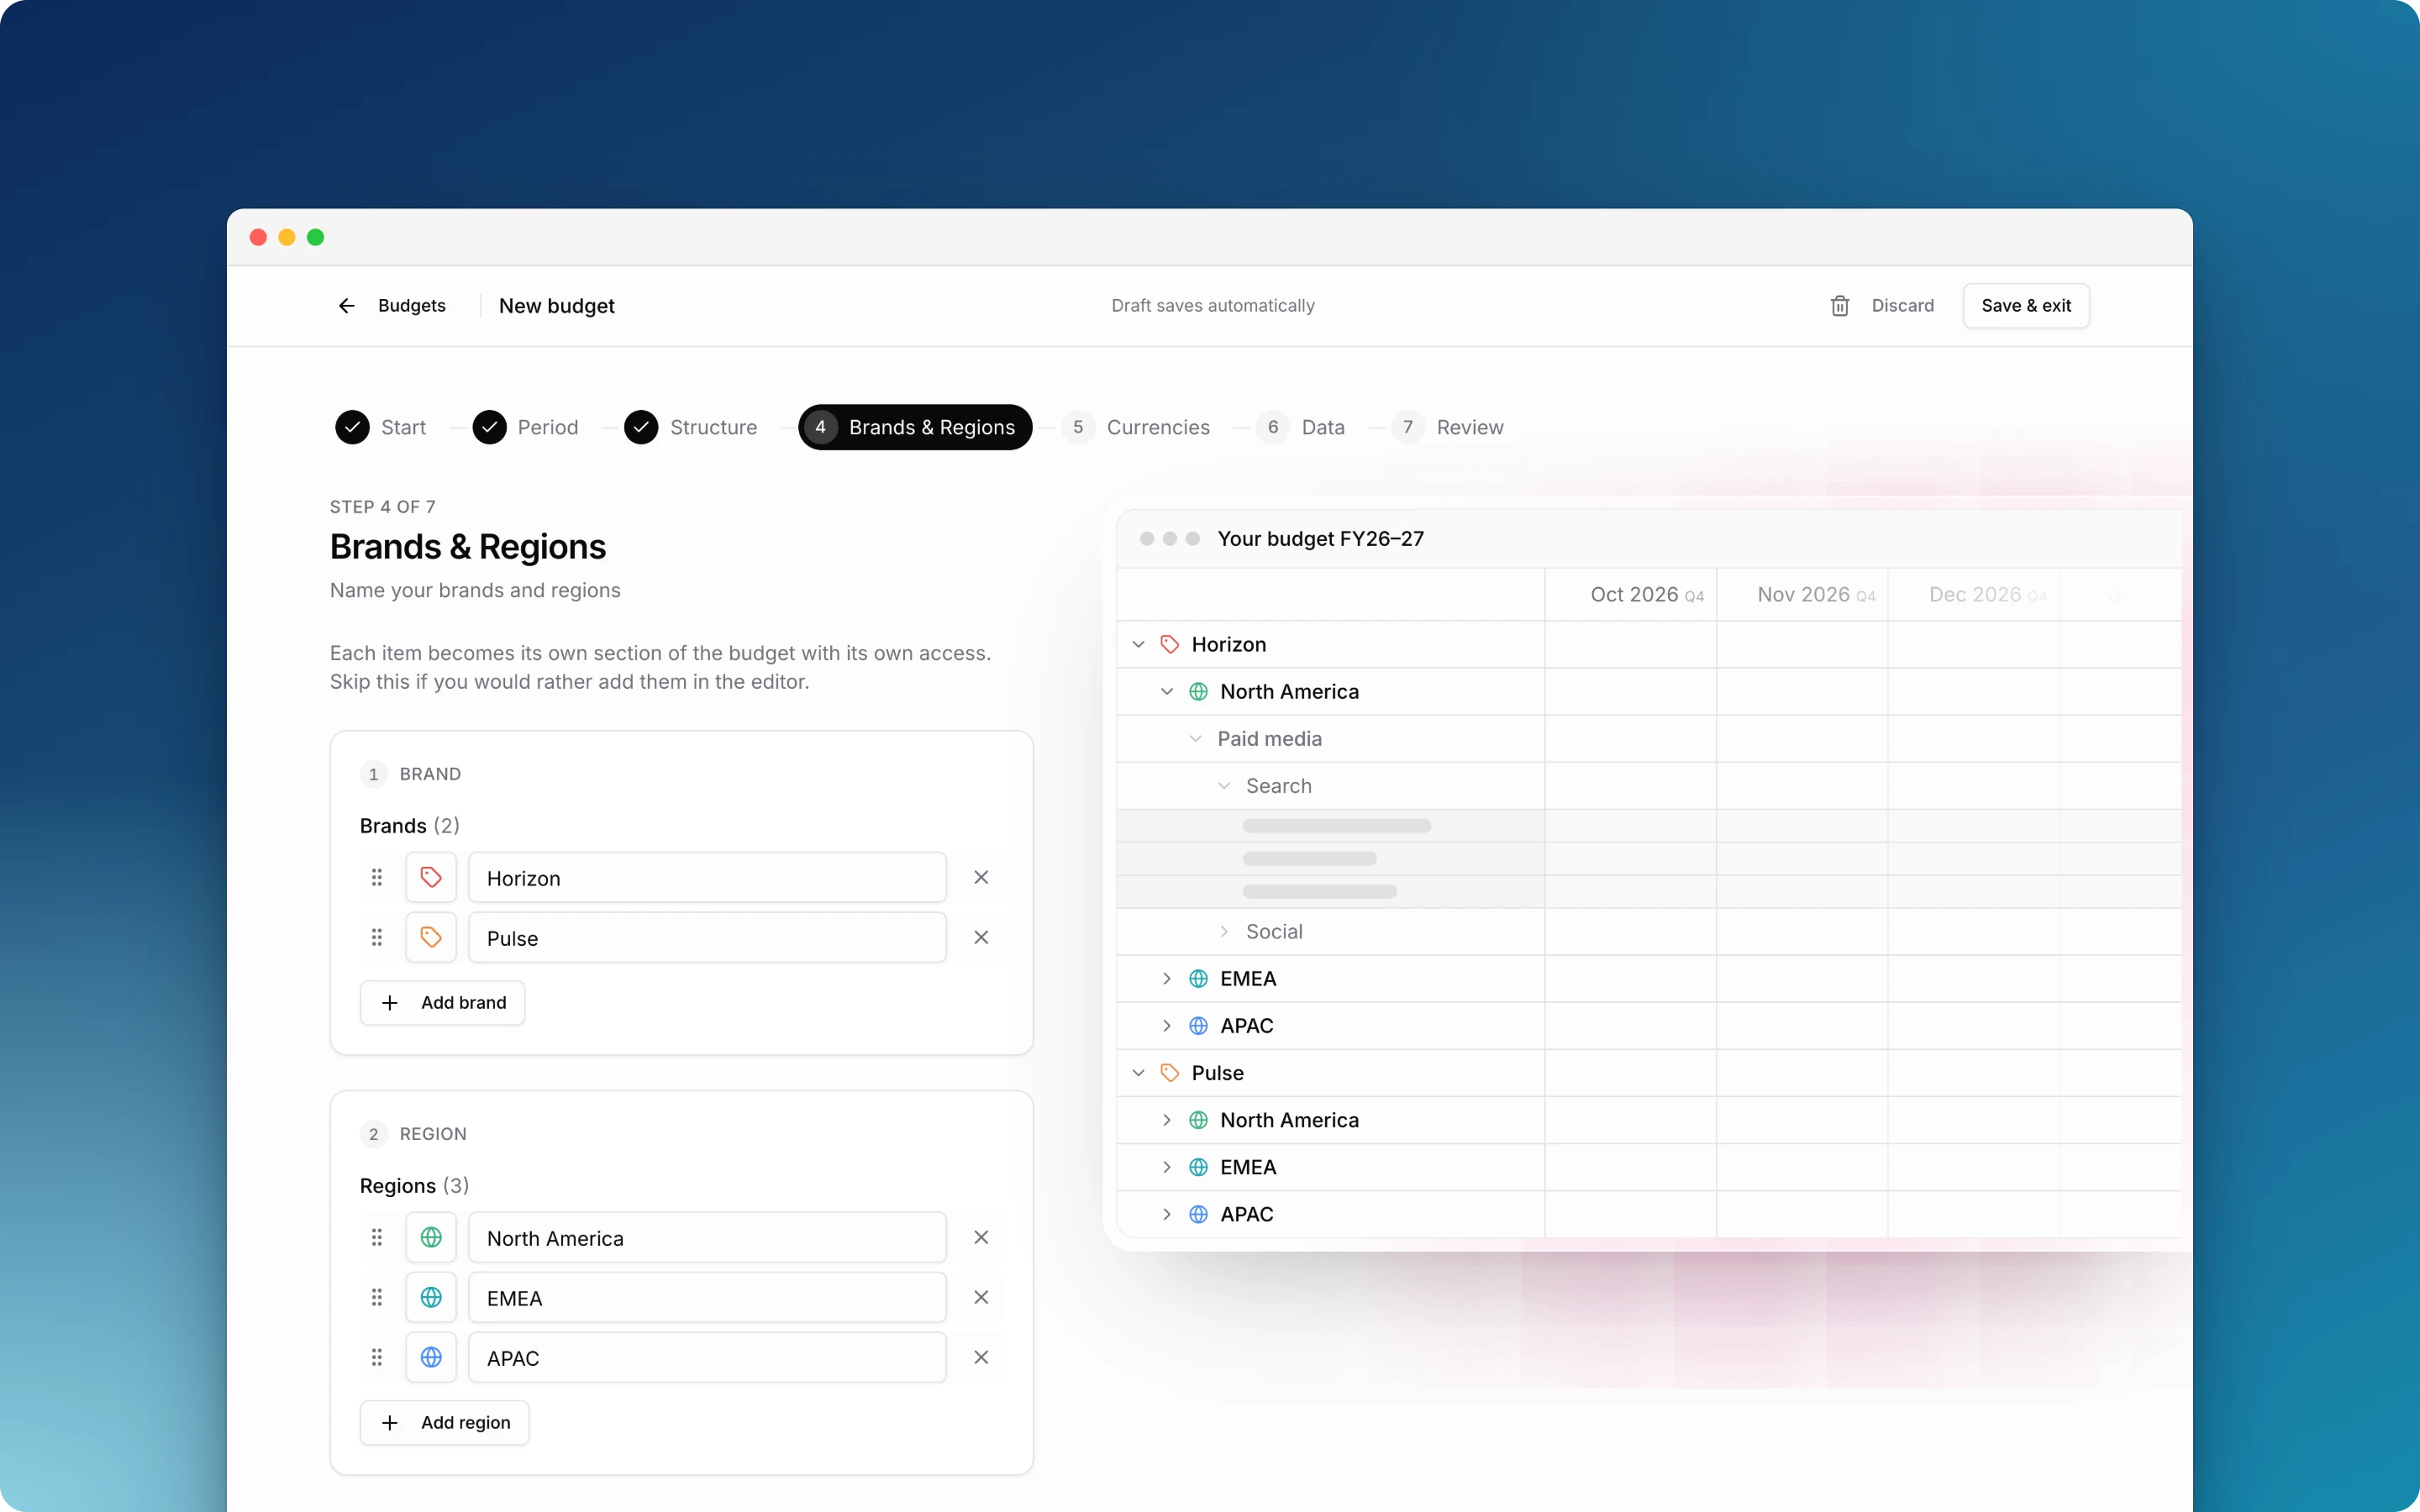
Starting a new budget? Click Create budget on the All budgets page. The budget creator opens and walks you through the setup one step at a time. The preview on the right shows the budget as you build it.
Already have a spreadsheet? Choose Import a spreadsheet on the first step. Learn more in Import a Budget.
Before you start
- Only organization administrators can create budgets.
- A budget period is 3 to 24 months.
- The creator saves a draft as you go. You can close it and come back later. See Drafts.
Step 1: Start
Choose how to start:
- Create a new budget: set the period and structure step by step. The rest of this page describes this path.
- Import a spreadsheet: upload a CSV or Excel file and Etropo pre-fills the next steps from it. Follow Import a Budget instead.
Click Continue.
Step 2: Period
- Select the Starts month. Etropo sets Ends to 12 months later. Change it if you need a different period.
- Optional: change the Calendar if your fiscal year does not start in January.
The calendar belongs to your organization and decides how quarters are labelled in every budget. Learn more in Fiscal Year.
Step 3: Structure
A budget has up to six levels. Master categories, categories, line items and expenses are always available. On this step you add up to two optional custom levels above them. Use custom levels when one budget covers several brands, divisions, regions or markets.
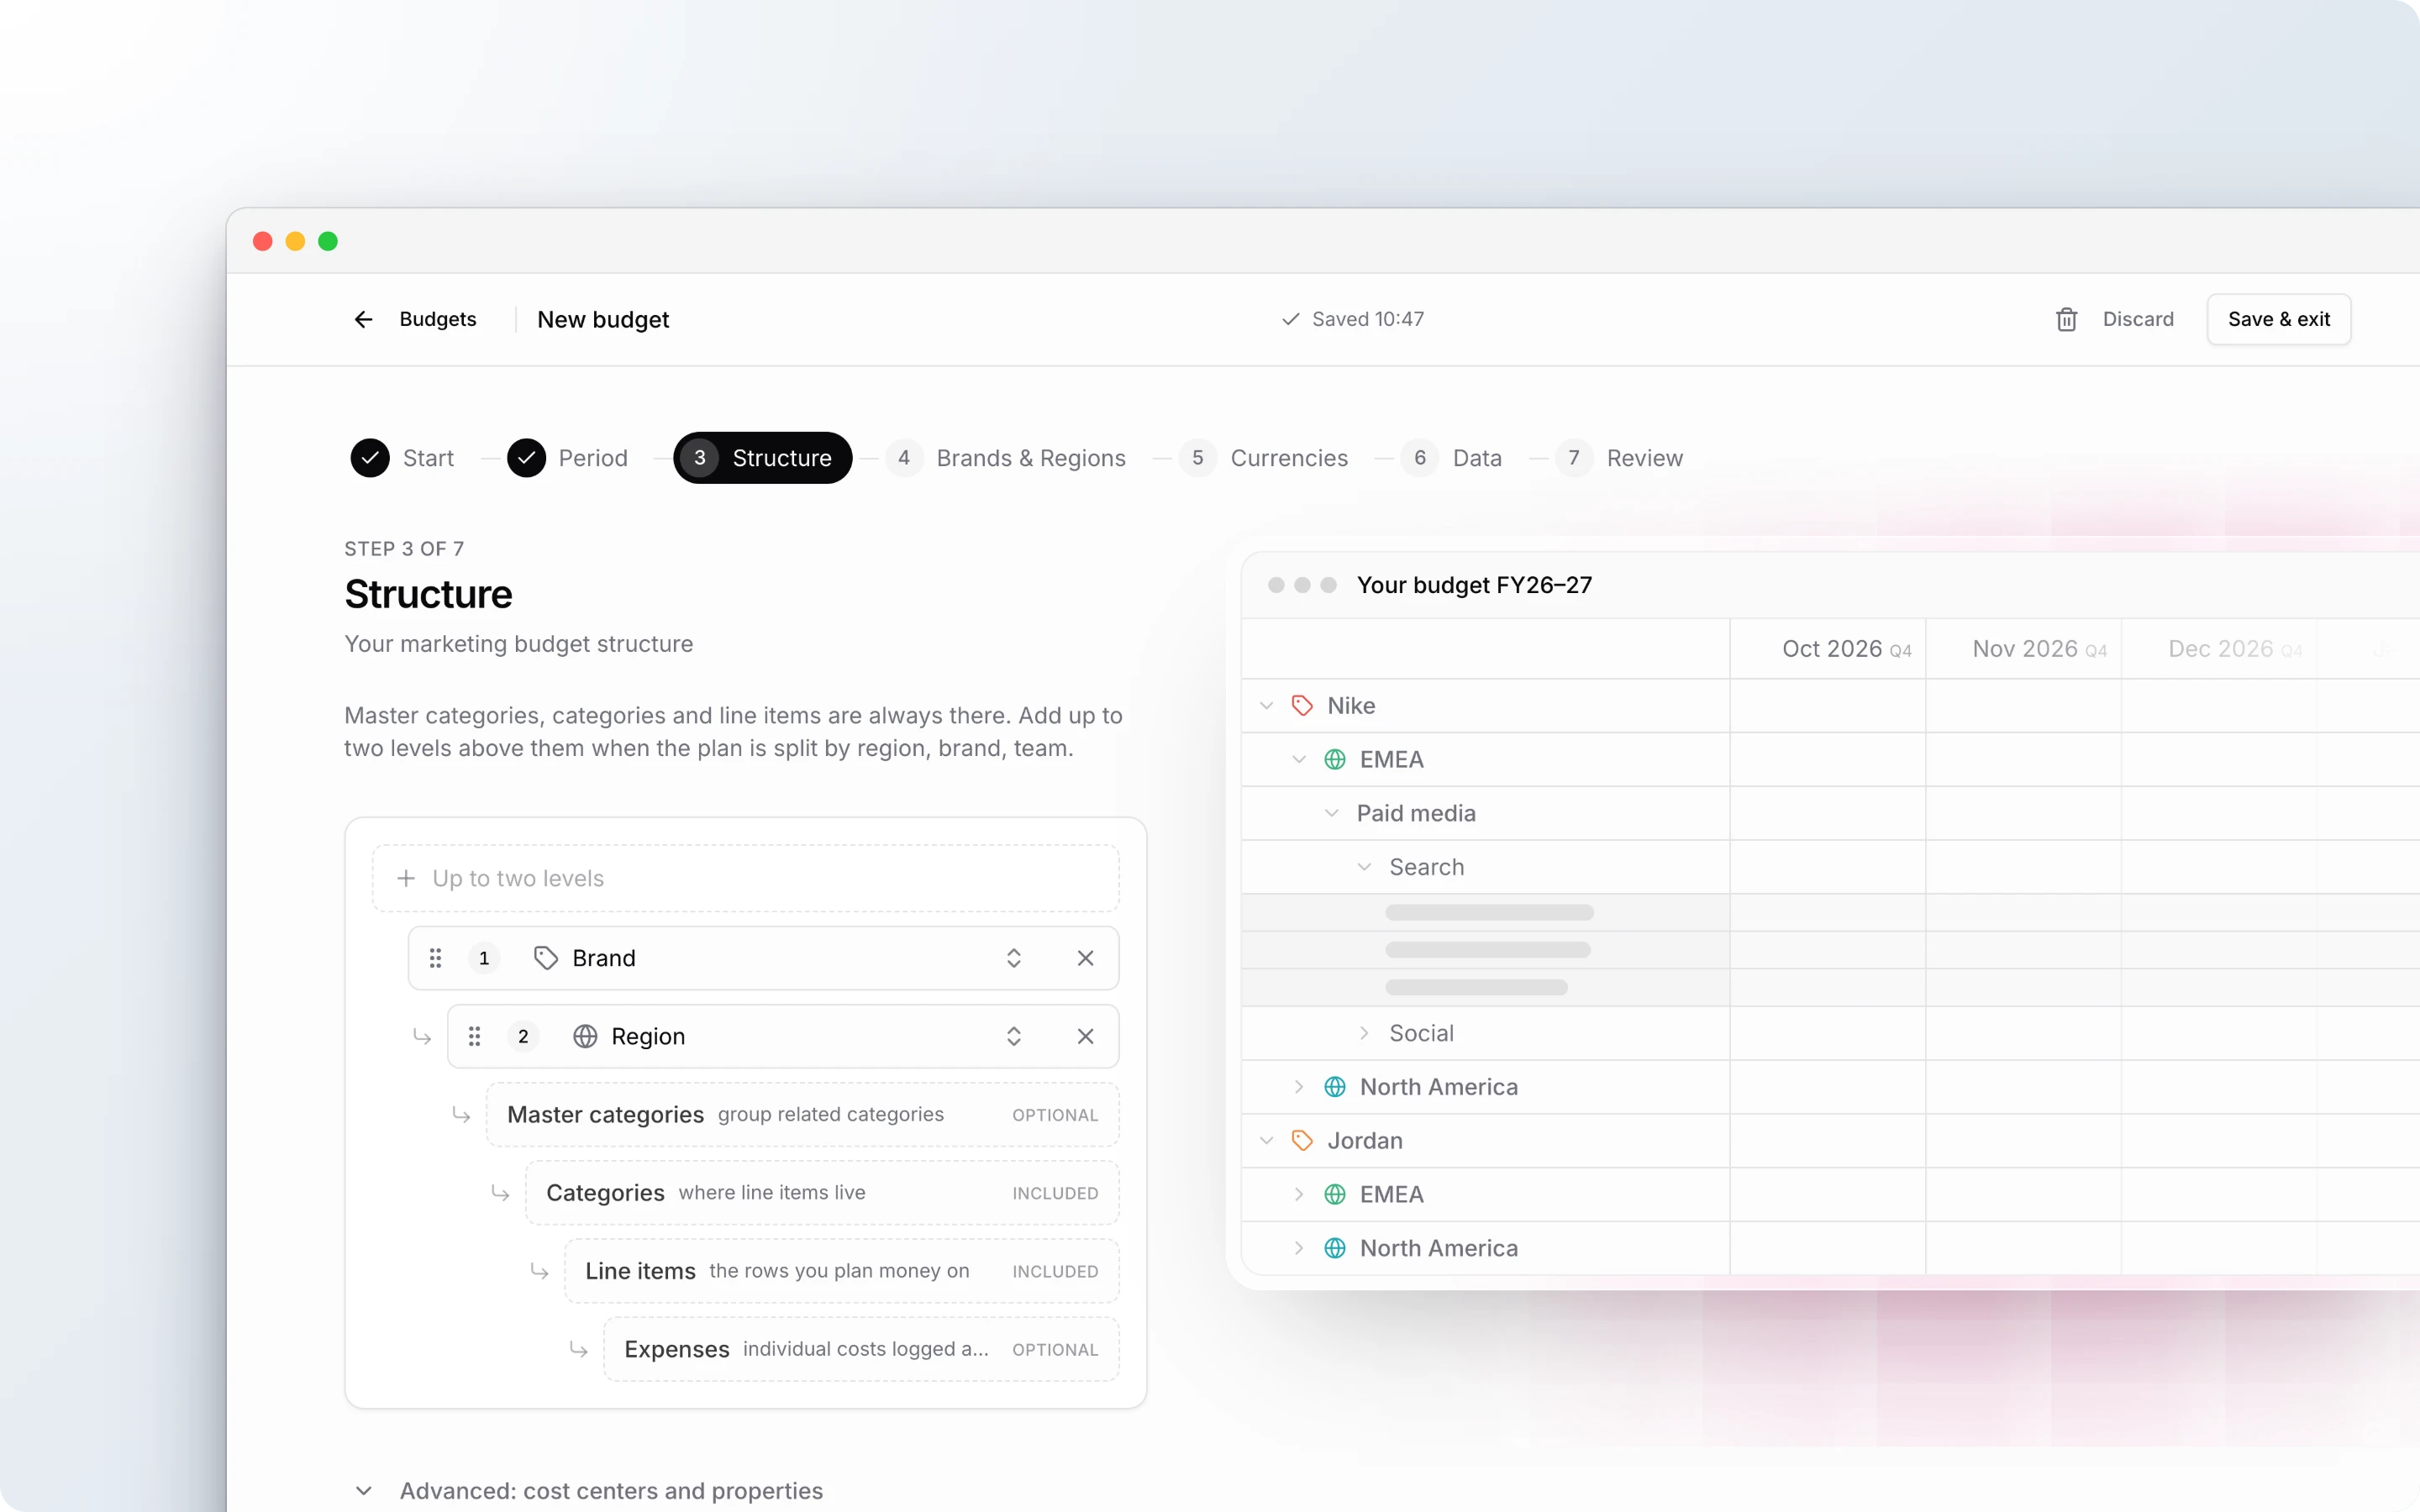
- Click Add a level above. A level row appears.
- Select a name from the list, for example Region, Brand or Division, or type your own. A level name has at most 20 characters.
- To add a second custom level, click Add a level above again. The new level goes on top. Drag the handle to swap the two levels.
Skip this step if your budget does not need custom levels. You cannot add or remove a custom level after the budget is created.
Advanced: cost centers and properties sets up cost centers and line item properties for your organization. They apply to every budget, so most teams skip this and add them later.
Step 4: Items of each custom level
This step appears only when you added a custom level. It is named after your custom levels, for example Regions & Brands or Divisions. The steps below use a budget split by Region and then by Brand. The app shows your own names.
- Click Add region and type the name of the region, for example EMEA. Press Enter to add the next one.
- Optional: click the icon in front of the name to choose an icon and a colour.
- Click Add brand and add the brands the same way.
Every region contains every brand, so 3 regions and 2 brands give 6 sections. Each section gets its own totals and its own access in the Budget Editor.
Click Skip for now to create the budget without items. You cannot add items to a custom level in the Budget Editor yet, so add them here.
Step 5: Currencies
Tick every currency the line items of this budget can be planned in. The ⋯ menu sets the default currency. Totals are converted to the default. Click Add currency if a currency is missing from your organization.
Click Skip for now to use only your organization’s default currency. Learn more in Currencies.
Step 6: Data
Choose where the categories and line items come from:
- Start from scratch: an empty budget with the structure you set up. Add categories and line items in the Budget Editor.
- Fill with demo data: a sample plan with Paid Media, Content & SEO, Events, Headcount and Tools & Software. Replace it with your own numbers.
- AI benchmarks: categories and line items suggested for your industry and team size. An extra step follows.
AI benchmarks
- Select the Business type, the Marketing team (in-house) size and your Industry. If your industry is not in the list, type it and select Use “your text”.
- Enter the Total budget for the period.
- Click Generate categories. Clear the checkbox of any category you do not want.
- Click Generate line items.
With custom levels, the demo data and the AI benchmarks are copied into every item of the lowest custom level, for example into every brand.
Step 7: Review
- Enter the Budget name. You can rename the budget at any time.
- Check the period, custom levels, currencies and data.
- Click Create budget.
Etropo opens the new budget in the Budget Editor.
Drafts
The creator saves your draft after every change. Click Save & exit to leave and come back later. On the All budgets page, the Unfinished budget setup card shows where you stopped. Click Resume to continue, or Discard to delete the draft.
Other administrators see A budget is being set up instead, without buttons. Only the administrator who started the draft can resume it. Each administrator has one draft at a time.
To delete the draft from inside the creator, click Discard, then Discard draft. Nothing has been created yet, so no budget is affected.
After you create a budget
- Status. Your first budget is Active. Every later budget starts as a Draft. Change the status from the Budget List.
- Versions. The budget starts with Version 1. Create more versions for a reforecast or a scenario. Learn more about budget versions.
- Access. Administrators see every category. Other team members see only the categories, or the items of a custom level (for example a brand), you give them access to. Learn more about access control.
- Team. Invite your team and assign line item owners so they can update actuals.
For additional help you can reach out to our support team at: help@etropo.com